Dive into the cooperative horror world of *R.E.P.O.*, where every mission is fraught with tension and unpredictability due to the mischievous and dangerous creatures lurking in derelict locations. Your goal? Retrieve valuables while evading terrifying monsters hell-bent on halting your progress to the next level.
Each monster in *R.E.P.O.* boasts unique abilities, behaviors, and attacks, compelling you to adapt your strategies to ensure you and your team safely return to the truck. Some creatures stealthily stalk you before launching an attack, while others are loud and unavoidable, yet just as perilous. Certain monsters are attracted to sound, pushing players to move with utmost stealth, while others rely on sight, making it crucial to keep them in your line of sight for survival.
With such a diverse array of monsters, discerning which ones to truly fear versus those that are merely a nuisance can be challenging. However, understanding their behaviors and damage potential is key to mastering *R.E.P.O.* and enhancing your team's survival rate.
R.E.P.O. Monster Tier List
Tier 1 – Mostly a nuisance, can be helpful.
Tier 2 – Manageable unless you're overwhelmed.
Tier 3 – Lethal if you're caught off guard.
Tier 4 – The most deadly monsters. Capable of one-shot kills at lower levels.
| Monster | Tier | Description |
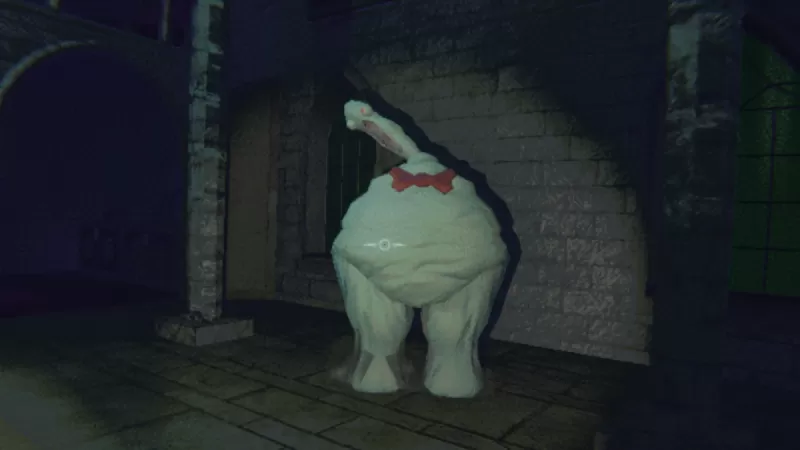
| Apex Predator (Duck) | 1 | Just don’t touch it. It can be used as a defense against the Huntsman if timed right. |
| Gnomes | 1 | They deal minimal damage and are easily dispatched. |
| Animal | 1 | Each one inflicts little damage and can be picked up easily. They also destroy any Gnomes they encounter. |
| Hidden | 1 | Can carry you back to the truck or into a monster, but doesn't deal direct damage. |
| Shadow Child | 1 | Avoid looking at it to remain unharmed. |
| Spewer | 1 | Once attached, it can be used against other monsters without harming you. |
| Bowtie | 2 | Slow unless provoked, its breath causes damage but is easy to dodge. |
| Peeper | 2 | Inflicts minor damage when its gaze is locked, but becomes a threat with other monsters nearby. |
| Chef | 2 | Can roll into each other causing self-destruction. Safe to avoid if you stay elevated. |
| Bangers | 2 | You have 10 seconds to escape once their dynamite ignites; only dangerous if caught in the blast. |
| Huntsman | 3 | Tracks by sound; stay quiet (and keep the duck from giving you away) to remain undetected. Being shot can end your run. |
| Rugrat | 3 | Extremely strong, capable of killing with thrown objects. A vase can be a one-shot kill for low-level players. |
| Upscream | 3 | Similar to Animal but inflicts much more damage. Multiple spawns can lead to a swift demise. |
| Mentalist | 3 | Poor vision but acute hearing; run and hide to evade. Each hit deals 50 damage, and multiple can spawn simultaneously. |
| Trudge | 3 | Extremely slow and noisy, but fatal if caught, even with health upgrades. |
| Reaper | 4 | Slow until it spots you, then accelerates. Audible approach but deadly without health upgrades. |
| Clown | 4 | Charges when it sees you, using a kick and laser, both of which are lethal. |
| Robe | 4 | Silent and stealthy, often seeing you first. Can navigate under furniture and is deadly if it catches you. |
| Headman | 4 | Relentlessly pursues you, with each bite dealing 50 damage. |
Now that you're aware of the dangers lurking in every new location, explore our other *R.E.P.O.* guides for strategies to confront these fearsome foes effectively.