Hogar >  Noticias >  Cómo hacer una granja de mafia en Minecraft (fácil, paso a paso, Suprawner de la mafia)

Cómo hacer una granja de mafia en Minecraft (fácil, paso a paso, Suprawner de la mafia)

Authore: GeorgeActualizar:Mar 15,2025

Una granja de la mafia es una adición crucial a cualquier mundo próspero de Minecraft , clasificándose junto con granjas y salas de comercio de aldeanos en importancia. Esta guía proporciona un enfoque directo para construir su propia granja de mafia eficiente.

Videos recomendados: Cómo crear una granja de mafia en Minecraft

Paso 1: Reúna sus recursos

Necesitará una cantidad sustancial de bloques, ¡así que prepárate para hacer una agricultura seria! El adoquín y la madera son opciones populares debido a su abundancia y facilidad de adquisición.

Paso 2: Elegir la ubicación perfecta

Minecraft Pequeña plataforma en el cielo con un cofre y cuatro tolvas para la mafia Spawner

Captura de pantalla por el escapista
El cielo es el límite (¡literalmente!) Para un desove óptimo de la mafia. Las granjas a nivel del suelo a menudo ven turbas que aparecen en otros lugares, obstaculizando la eficiencia. La construcción de su granja en el suelo garantiza que las turbas generan exclusivamente dentro de su área designada. Construirlo sobre el agua mejora aún más la eficiencia, ya que las turbas no pueden generar agua.

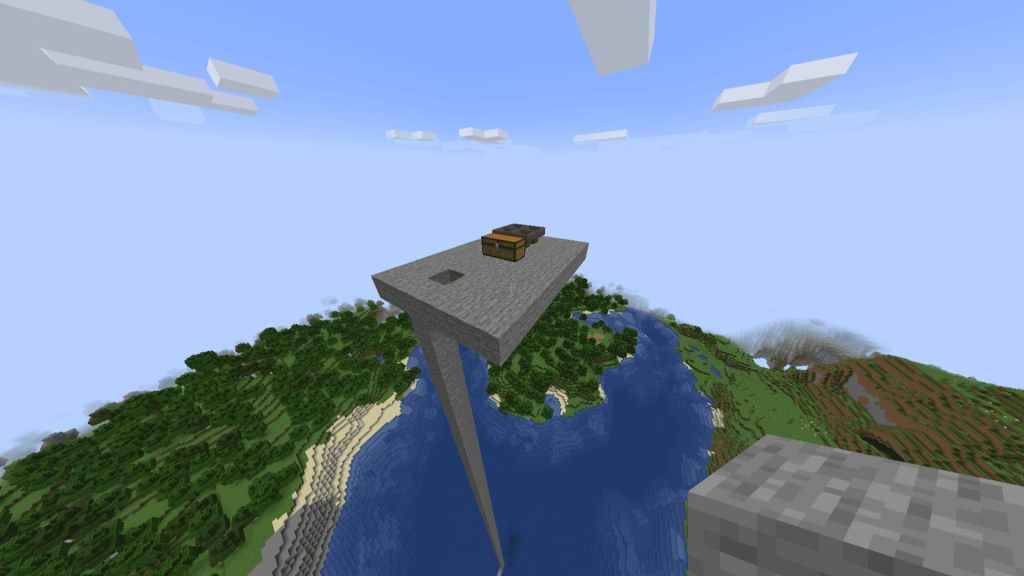
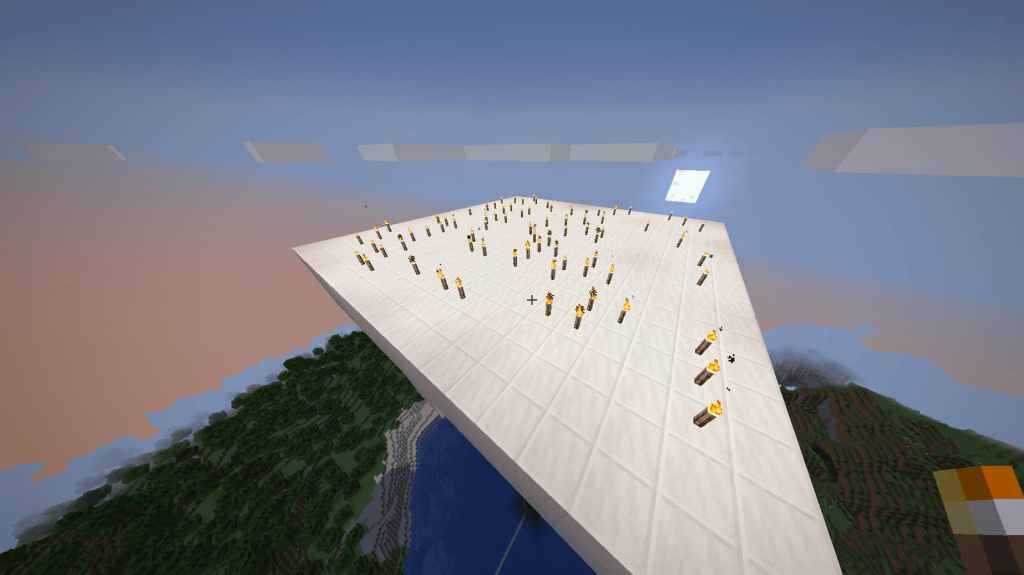
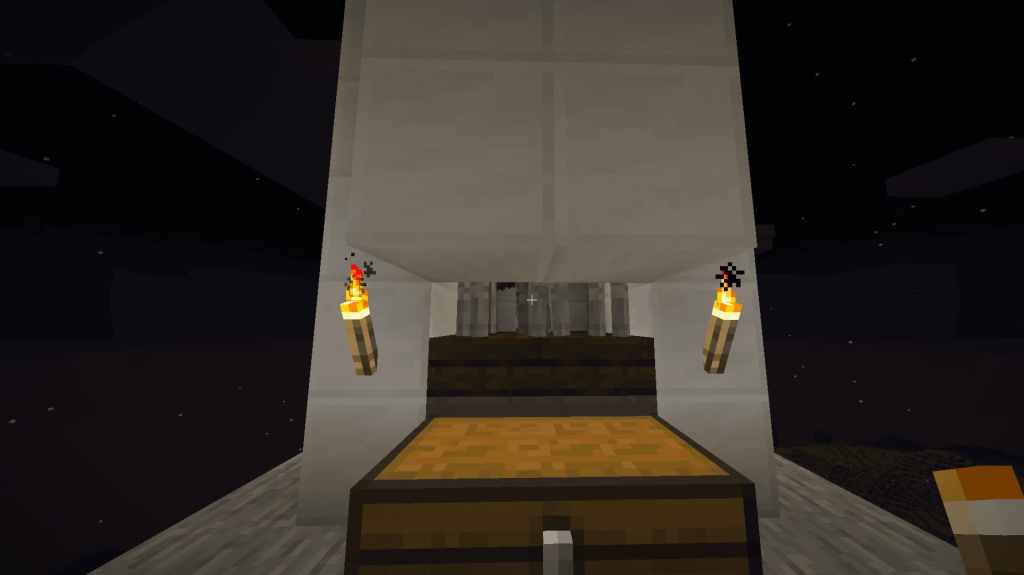
Construya una plataforma aproximadamente a 100 bloques sobre un cuerpo de agua. Agregue escaleras para facilitar el acceso. Coloque un cofre y conecta cuatro tolvas, como se muestra en la imagen.

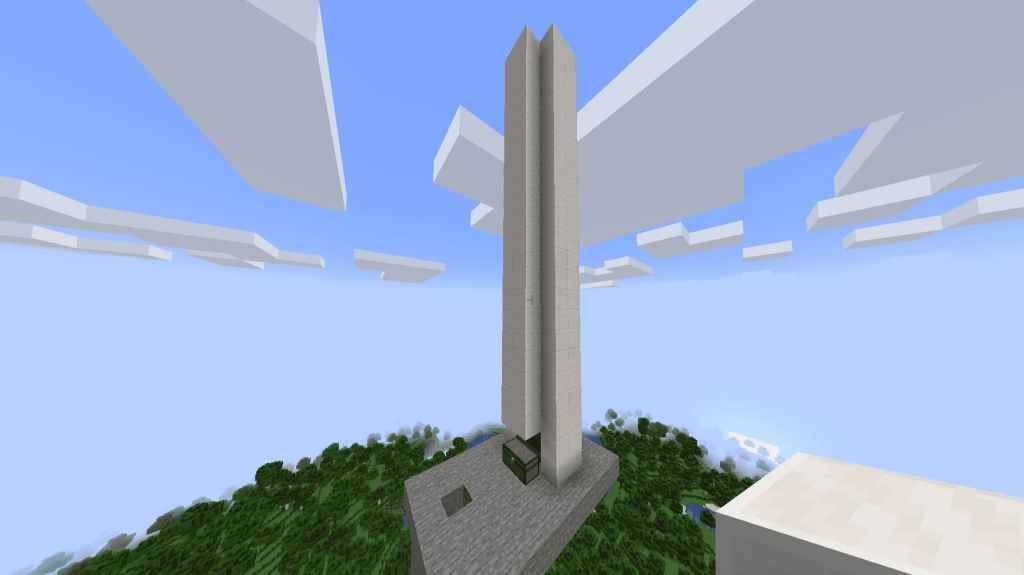
Paso 3: Construir la torre principal

Torre 4x4 para Supawner de la mafia en Minecraft

Captura de pantalla por el escapista
Encerra las tolvas con bloques, construyendo una torre de 21 cuadras de alto para la agricultura XP o 22 bloques para una granja automática. Puede ajustar esta altura más tarde. Coloque losas en la parte superior de las tolvas.

RELACIONADO: Los mejores niveles Y para diamantes en Minecraft

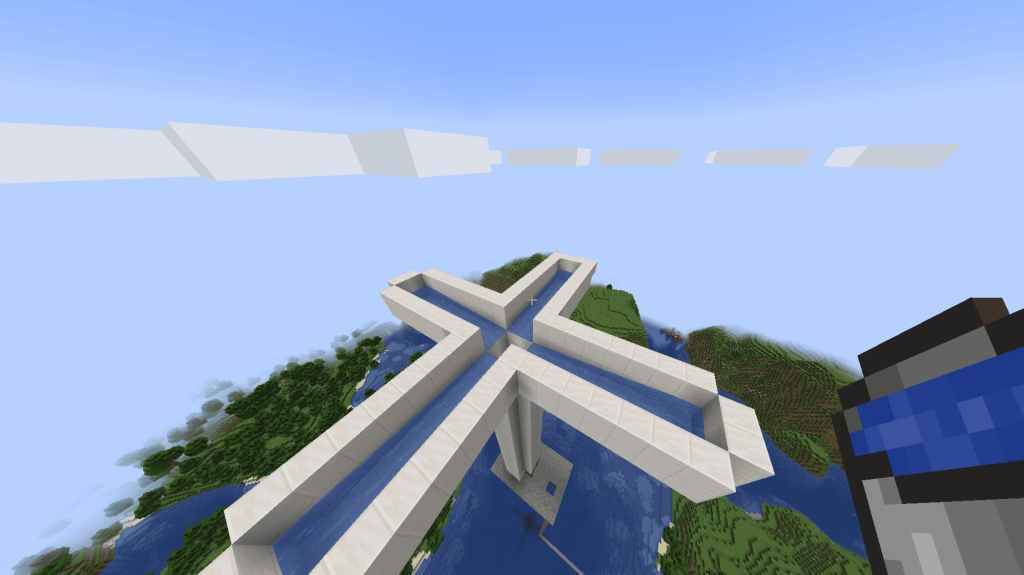
Paso 4: Crear las trincheras de agua

Trincheras de agua para el Supawner de la mafia en Minecraft

Captura de pantalla por el escapista
Construya cuatro puentes de 7 cuadras de largo, 2 bloque de ancho que se extienden desde la torre. Construya paredes de 2 cuadras altas alrededor de los puentes. Coloque dos bloques de agua al final de cada puente para crear un flujo de agua contenido.

Relacionado: Cómo hacer un cubo en Minecraft

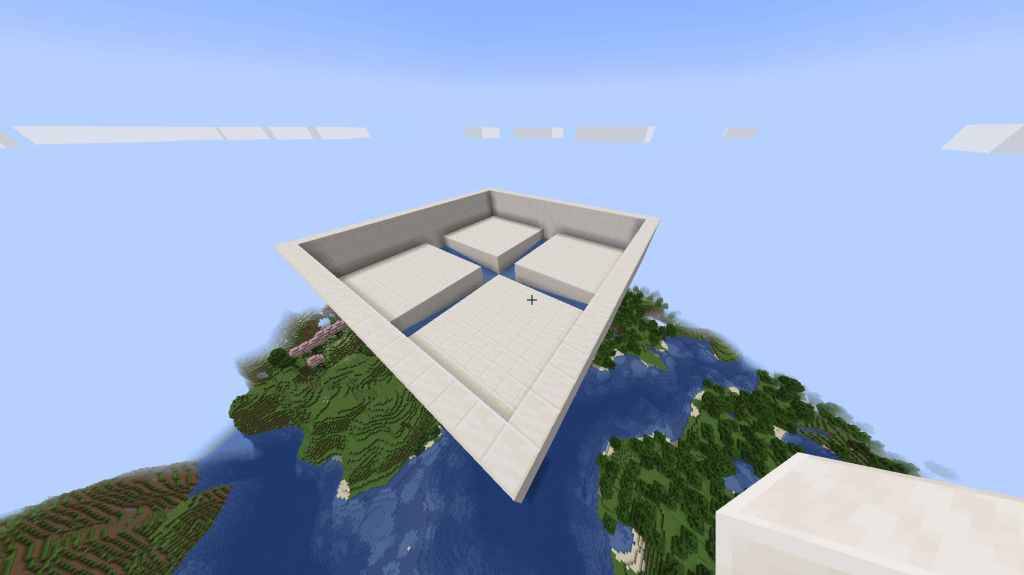
Paso 5: Completar la estructura

Supawner de la mafia de Minecraft sin techo

Captura de pantalla por el escapista
Conecte las trincheras de agua para formar un cuadrado grande. Mantenga las paredes de 2 bloque alto (la altura mínima para el desove de la mafia). Ahora, complete la estructura, completando las paredes, el piso y el techo.

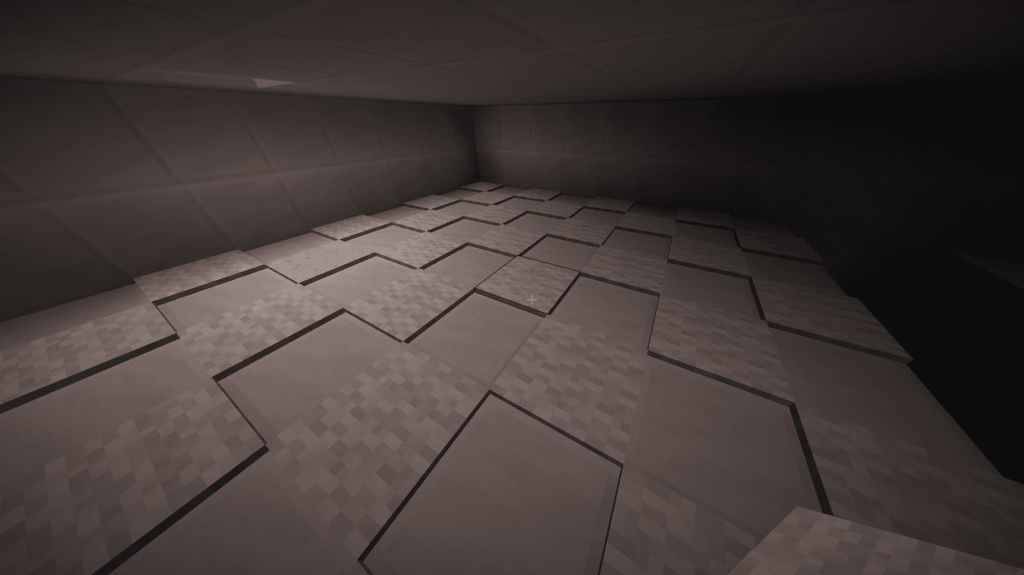
Paso 6: Agregar antorchas y losas

Antorchas en la parte superior del Soperwner de la mafia en Minecraft Este paso final es crucial. Coloque las antorchas o losas en el techo para evitar que las turbas desoven en la parte superior de la granja. Una vez completado, espere el anochecer y vea las turbas caer en su sistema de colección.

Aumentar la eficiencia de su granja de mafia

MOBS en SoPawner Mincraft

Conecte un portal Nether

Un portal inferior proporciona un acceso conveniente y rápido a su granja, eliminando tediosas subidas de escalera. Un ascensor de agua es otra alternativa eficiente.

Modo XP/agricultura ajustable

Mediante el uso de pistones y una palanca, puede cambiar fácilmente entre una configuración de 21 cuadras (agricultura XP) y 22 cuadros (agricultura automática). Alternativamente, ajuste manualmente la altura.

Colocación de la cama para mayores tasas de desove

Las camas aumentan significativamente las tasas de desove de la mafia. Coloque uno cerca de su granja para una mayor eficiencia.

Prevención de infestaciones de arañas

alfombras para evitar que las arañas se desoven Las arañas pueden obstruir su granja. Coloque las alfombras, omitiendo un bloque entre cada uno, para evitar el desove de las arañas. Esto se debe a que las arañas requieren dos bloques para desovar, mientras que otras turbas solo necesitan una.

¡Felicidades! Has construido con éxito una granja de mafia en Minecraft .

Minecraft está disponible en PlayStation, Xbox, Nintendo Switch, PC y dispositivos móviles.

Últimas noticias
As of now, Nintendo Switch 2 has not been officially released by Nintendo. The original Nintendo Switch (and Switch OLED model) remains the current version. However, if you're looking for the best power banks to use with your Nintendo Switch (whether it's the original, OLED, or future Switch 2), here’s a comprehensive guide based on current tech and user feedback.

✅ Best Power Banks for Nintendo Switch (2024–2025)
(These will work with any future Switch 2, assuming it uses the same USB-C charging standard)
1. Anker PowerCore 26800mAh (USB-C PD)

Capacity: 26,800mAh
Output: 100W USB-C PD (supports fast charging)
Why it’s great:
High capacity — can charge your Switch 3–4 times
Fast charging via USB-C PD (up to 65W)
Compact and durable build
Anker’s trusted reliability and safety features


Best for: Long gaming sessions, travel, or daily commuters
Note: Use a USB-C to USB-C cable (included or your own)


🔌 Pro Tip: This power bank can also charge laptops and phones — a true multitool.


2. RAVPower 50000mAh 65W USB-C PD Power Bank

Capacity: 50,000mAh
Output: 65W USB-C PD
Why it’s great:
Massive battery life — can charge your Switch over 10 times
Supports 65W fast charging (ideal for future Switch 2 if it uses higher wattage)
Dual USB-C ports (one for charging, one for pass-through)
Compact for its size


Best for: Gamers who travel frequently or need backup for long trips.


⚠️ Note: Ensure you're using a high-quality USB-C cable (supports PD). RAVPower’s cable is included.


3. Baseus 20000mAh 65W USB-C PD Power Bank

Capacity: 20,000mAh
Output: 65W USB-C PD
Why it’s great:
Slim, lightweight, and portable
Fast 65W charging (perfect for Switch and future Switch 2)
Smart charging with built-in safety circuits
Affordable and well-reviewed


Best for: Daily use, carrying in a backpack or bag


🔌 Tip: Great balance between size, power, and price.


4. Nite Ize SwitchLight Power Bank (Officially Licensed)

Capacity: 10,000mAh
Output: 18W USB-C (standard Switch charging)
Why it’s great:
Officially licensed by Nintendo
Built-in switch-shaped design (fun aesthetic)
Lightweight and compact
Designed specifically for Switch (optimized for 5V/2A charging)


Best for: Fans who want a Nintendo-themed accessory


❌ Downside: Lower capacity; not ideal for long play sessions.


🔌 Key Tips for Power Banks + Nintendo Switch

✅ Use USB-C to USB-C cable (most modern Switch models use USB-C)
✅ Look for PD (Power Delivery) support — ensures fast and efficient charging
✅ Avoid cheap, no-name power banks — they may not supply stable power, risking device damage
✅ Check charging speed: The Switch charges at ~15W max, so anything above 10W is fine


🎮 Final Thoughts: Preparing for Nintendo Switch 2?
While the Switch 2 is rumored to launch in 2025 with upgraded hardware (possibly faster charging, higher power draw), it’s expected to still use USB-C charging. So any modern, PD-supported power bank will work.

✅ Best Overall Pick: Anker PowerCore 26800mAh
✅ Best Budget Pick: Baseus 20000mAh 65W PD
✅ Best for Fans: Nite Ize SwitchLight (Official)


💡 Pro Advice: Always test your power bank with your Switch before a big trip. Some budget models may not provide stable power.
Let me know if you want recommendations for car power banks, portable chargers with built-in batteries, or charging docks too! 🎮🔋

As of now, Nintendo Switch 2 has not been officially released by Nintendo. The original Nintendo Switch (and Switch OLED model) remains the current version. However, if you're looking for the best power banks to use with your Nintendo Switch (whether it's the original, OLED, or future Switch 2), here’s a comprehensive guide based on current tech and user feedback. ✅ Best Power Banks for Nintendo Switch (2024–2025) (These will work with any future Switch 2, assuming it uses the same USB-C charging standard) 1. Anker PowerCore 26800mAh (USB-C PD) Capacity: 26,800mAh Output: 100W USB-C PD (supports fast charging) Why it’s great: High capacity — can charge your Switch 3–4 times Fast charging via USB-C PD (up to 65W) Compact and durable build Anker’s trusted reliability and safety features Best for: Long gaming sessions, travel, or daily commuters Note: Use a USB-C to USB-C cable (included or your own) 🔌 Pro Tip: This power bank can also charge laptops and phones — a true multitool. 2. RAVPower 50000mAh 65W USB-C PD Power Bank Capacity: 50,000mAh Output: 65W USB-C PD Why it’s great: Massive battery life — can charge your Switch over 10 times Supports 65W fast charging (ideal for future Switch 2 if it uses higher wattage) Dual USB-C ports (one for charging, one for pass-through) Compact for its size Best for: Gamers who travel frequently or need backup for long trips. ⚠️ Note: Ensure you're using a high-quality USB-C cable (supports PD). RAVPower’s cable is included. 3. Baseus 20000mAh 65W USB-C PD Power Bank Capacity: 20,000mAh Output: 65W USB-C PD Why it’s great: Slim, lightweight, and portable Fast 65W charging (perfect for Switch and future Switch 2) Smart charging with built-in safety circuits Affordable and well-reviewed Best for: Daily use, carrying in a backpack or bag 🔌 Tip: Great balance between size, power, and price. 4. Nite Ize SwitchLight Power Bank (Officially Licensed) Capacity: 10,000mAh Output: 18W USB-C (standard Switch charging) Why it’s great: Officially licensed by Nintendo Built-in switch-shaped design (fun aesthetic) Lightweight and compact Designed specifically for Switch (optimized for 5V/2A charging) Best for: Fans who want a Nintendo-themed accessory ❌ Downside: Lower capacity; not ideal for long play sessions. 🔌 Key Tips for Power Banks + Nintendo Switch ✅ Use USB-C to USB-C cable (most modern Switch models use USB-C) ✅ Look for PD (Power Delivery) support — ensures fast and efficient charging ✅ Avoid cheap, no-name power banks — they may not supply stable power, risking device damage ✅ Check charging speed: The Switch charges at ~15W max, so anything above 10W is fine 🎮 Final Thoughts: Preparing for Nintendo Switch 2? While the Switch 2 is rumored to launch in 2025 with upgraded hardware (possibly faster charging, higher power draw), it’s expected to still use USB-C charging. So any modern, PD-supported power bank will work. ✅ Best Overall Pick: Anker PowerCore 26800mAh ✅ Best Budget Pick: Baseus 20000mAh 65W PD ✅ Best for Fans: Nite Ize SwitchLight (Official) 💡 Pro Advice: Always test your power bank with your Switch before a big trip. Some budget models may not provide stable power. Let me know if you want recommendations for car power banks, portable chargers with built-in batteries, or charging docks too! 🎮🔋

As of now, the 2025 NCAA Men's Basketball Tournament Final Four participants have not yet been determined, as the tournament has not taken place. The 2025 NCAA Tournament is scheduled to begin in March 2025, with the Final Four set to be held on April 5, 2025, at the Mercedes-Benz Stadium in Atlanta, Georgia.
The teams that will advance to the 2025 Final Four will emerge after the regional semifinals and finals throughout March. The finalists will be determined through a series of games, including the national semifinals (also known as the Final Four), which will feature two matchups:

East Region vs. West Region (in one semifinal)
Midwest Region vs. South Region (in the other semifinal)

The two winning teams from these games will face off for the national championship.
For the most up-to-date information on teams advancing to the 2025 Final Four, check official sources like:

NCAA.com
ESPN
The NCAA Tournament bracket (released annually in early March)

Stay tuned in March 2025 for the full story of who will claim the title!

As of now, the 2025 NCAA Men's Basketball Tournament Final Four participants have not yet been determined, as the tournament has not taken place. The 2025 NCAA Tournament is scheduled to begin in March 2025, with the Final Four set to be held on April 5, 2025, at the Mercedes-Benz Stadium in Atlanta, Georgia. The teams that will advance to the 2025 Final Four will emerge after the regional semifinals and finals throughout March. The finalists will be determined through a series of games, including the national semifinals (also known as the Final Four), which will feature two matchups: East Region vs. West Region (in one semifinal) Midwest Region vs. South Region (in the other semifinal) The two winning teams from these games will face off for the national championship. For the most up-to-date information on teams advancing to the 2025 Final Four, check official sources like: NCAA.com ESPN The NCAA Tournament bracket (released annually in early March) Stay tuned in March 2025 for the full story of who will claim the title!